How to Fix a Leaky Shower

Drip...drip...drip...
The sound of a leaky shower is enough to drive anyone bonkers!
Shower leaks are a common household problem and waste a considerable amount of water and money. To stop your shower from dripping however, you don't need to call a plumber just yet. The solution may just be simpler than you think...
A leaky shower component is the most likely reason for a dripping shower, and the leak normally occurs around the shower valve or shower head. Before you shell out your savings, have a go at our leaky shower tips to sort out that shower once and for all!
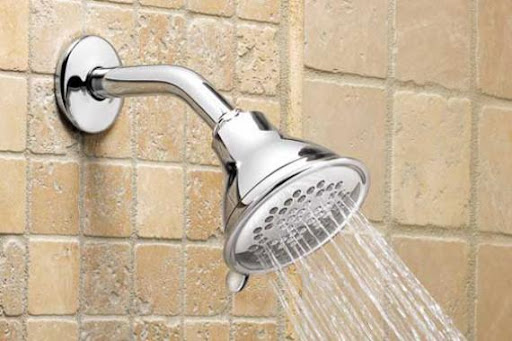
Repair the showerhead
It's very common to have a leaking shower head if it has seen many years of use. If this is the case, then it's fairly simple to resolve without any prior plumbing knowledge.
1 Shut off the water supply
Before you remove the showerhead for inspection, you need to shut off the water supply. Keep a towel handy in case water leaks out.
2 Unscrew
You need to remove and examine the showerhead to determine the cause of the leak. Use your hands, pliers or a crescent wrench to grip the showerhead (or connecting nut) and turn counterclockwise to unscrew. Take care not to bend or move the shower pipe.
3 Inspect
Look inside the showerhead for a small plastic washer or rubber O-ring. Wear and tear on this component commonly causes leakages. This is because the O ring may become dry and brittle over time - reducing its ability to hold in water. If the O ring looks worn down, its time to replace it!
4 Clean
Showerheads spray unevenly because their tiny holes have become plugged with mineral deposits. Mineral deposits, limescale or hard water sediment can significantly reduce water flow and need to be removed. To do so, remove the shower head and soak in a white wine vinegar and water solution.
Using a small cooking pot, mix water and three cups of vinegar and bring it to the boil. Turn off the heat and rest the showerhead (minus any rubber parts that can removed) in the solution for approximately 20 to 30 minutes. Remove, rinse and scrub the inside and outside of the shower head with an old toothbrush.
5 Tape It Up
Once the washer or O-ring has been replaced, wrap a thin strip of Teflon tape around the threads at the very tip of the pipe stem. This ensures a good seal. Reattach the shower head to the shower arm with your hand or using a wrench. Protect the fixture's finish with soft towels whilst you are working.
6 Test It Out
Turn the water back on and run your shower for a few moments. After this, turn off the shower and wait to see if there is still a persistent leak.
Repair the Shower Valve
The faucet is the second most common place to find a shower leak. Usually, the leak is caused by a worn-out washer on the shower stem which can be easily replaced.
1 Shut off the water supply
Shut off the water supply at the water main. Then open the shower faucet to let any remaining water drain out.
2 Disassemble the valve
You will need to remove both the shower valve handle and the escutheon plate (metal cover) to access the internal components of the shower. Firstly, remove the shower valve handle by using a screwdriver to loosen the centre screw. Once the handle has been removed, unscrew the escutcheon plate from the shower too. Don't let the loosened screws fall into the shower or down the waste!
3 Replace the washers
All the valve washers, o-rings and seals should be removed and replaced to optimise shower performance. Make sure you check the valve stem seat to see if it is damaged. If this is the case, the shower will continue to leak.
4 Put the valve back together
Reverse the procedures in Step #1 to reassemble the valve. Before you do so, clean the pipes with the same vinegar and hot water solution that can be used to clean the shower head.
5 Test the leak
Your shower should now be leak free! Turn the water main back on and run the shower for a couple of minutes to check. If the leak still isn't resolved, contact a plumber for a professional evaluation.

Happy washing!